I'll try to do my best, the most detailed I can. I'm not very good with words, so there are a lot of pictures: I tried to keep them as much lightweight I could, so this tut will not be too hard to load, even with dial-up connections (about 320Kb in total).
Enough for preamble: let's start.
In this tutorial I will show step by step how to customize Christianlov's Custom Skintones Selector, adding other skintones of your choice; this mechanism should also suggest as well how to delete (or hide) other skintones from Selector's menu.
As usual, feel free to ask for clarifications if anything is not clear enough.
For the love of semplification, I will use the fourth Selector (Christianlov_CustomSkintoneSelector4.package), because it links skintones by two creators only, thus is simpler to read (and mod).
I will add one of AllenABQ's hairy skintones: the Black Tan s1 (cccf720d_BlackDefTan1.package), but you can of course do the same steps with any other of your choice.
The resources we'll mod will be STR#s and BHAVs, for the skintones list and the dynamic menu.
1. Preparing the menuOpen Christianlov_CustomSkintoneSelector4.package in SimPE, choose Text Lists, then MakeActionString prim set (these are the text that will appear in menus)
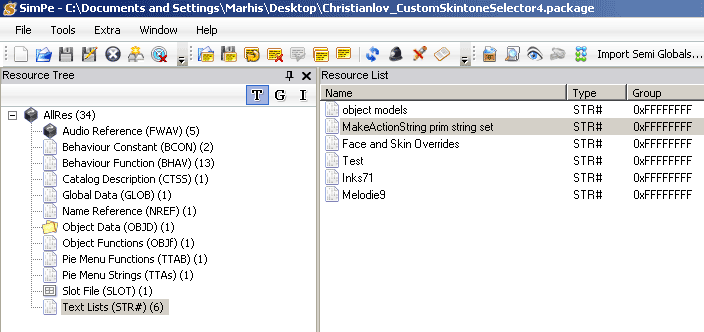
In Plugin View, add a line with the new text, with this syntax:
Author.../
Skintone (see examples in pict). Three periods and a slash will add a menu (text before ".../") and a submenu (text after).
Commit, save.
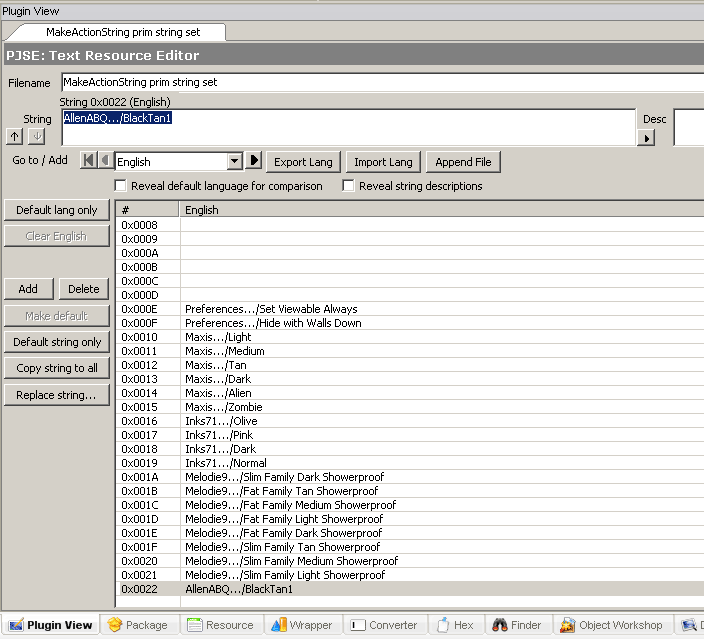
2. Insert new skintone referenceNow (always in Text Lists) select the last resource with a skintones' author name - in our case, Melodie9 - and clone it.

In Plugin View, we change the filename, and in Resource View, the instance number (0x303D). The number is in hexadecimal, and we have to increase it by 1. If you're not much into hex, you may use the Converter (see the tabs in SimPE):
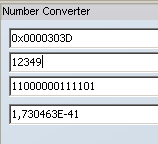
Here we see that 0x303D means 12349 decimal.

Changing 12349 in 12350, we obtain the corresponding hex value: 0x303E.
Now, change the filename in Plugin tab...

...and the instance number in Resource tab:

In Plugin view, again, delete all entries (they are Melodie9 skintones family strings).
Commit, save.
Now, we need to add the reference to the new skintone: close the selector and open the skintone package.
Select Skin Tone XML resource, and copy (ctrl-C) the family dtstring.

Close the skintone, re-open the Selector.
Go again in Text Lists, AllenABQ (or your author's name), add a line (will have 0x0000 #) and paste the string in.
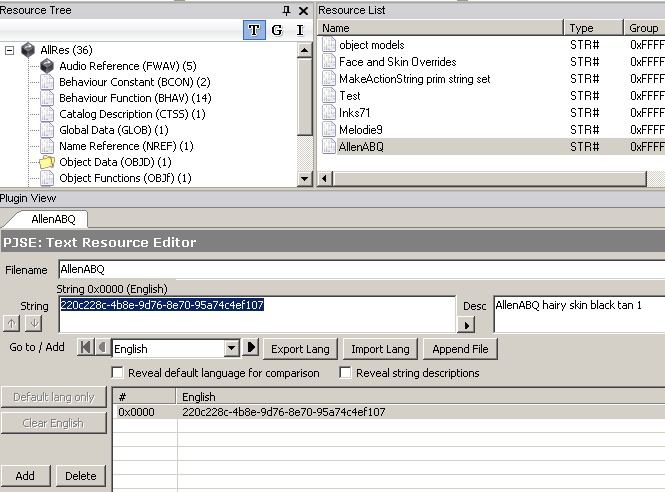
Write also some descriptive text (see pict), so you'll remember what that string is.
Commit and save.
3. Link the skintone to the submenu entryGo to Behaviour Functions (BHAV) and select Sub - Melodie9 - Action String.

Clone it, change its name (Sub - AllenABQ - Action String) and increase by 1 its instance number, just the same you did in step 2.


Commit and save (just in case).
Now some action: in Plugin view, we'll edit the BHAV in PJSE Behaviour Editor. Sounds thrilling, doesn't it?

Let's try to understand what those instructions mean:
First instruction (#0) means that we are referring to STR# resource with instance number 0x303D.
Second instr. (#1) means that we are referring to the line #0x0000 of that resource (in which we pasted the skintone family string).
Third instr. (#2) means that all this corresponds to the menu shown.
Remember? We cloned STR# 0x303D, and changed it's instance number in 0x303E. Also, we addeed another menu for that STR#. What we need now is to change those references to new ones.
Select the first instruction (#0) and click on the little button on the right, that with hammer and key symbol: it will bring up the PJSE Instruction Wizard. Change that literal number as shown, and click OK.

Then, select the third instruction (#2) and click the same button: the window will be slightly different. Click on the double-arrow button just left of the old "Melodie9" menu, and in the next window choose the replacement string (should be self-explanatory).
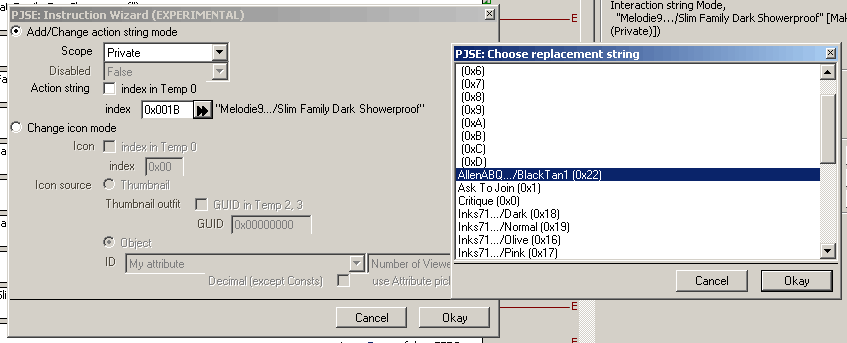
Note: sometimes (at least, in my system) the string list may be shown not updated: in this case, just save, close the package and reopen it.
Fine: now it shows the correct menu string:

Click okay again

4. Resizing the menuAs you may have understood by this time, the rest of that BHAV repeats similar instructions for every entry. As because we addeed only 1 entry, we don't need all that additional stuff, and it would be better to shorten that menu. This means that we have that BHAV to stop early, and we'll obtain that effect by turning the target from line #3 in TRUE instead, and this will make the BHAV to stop there.
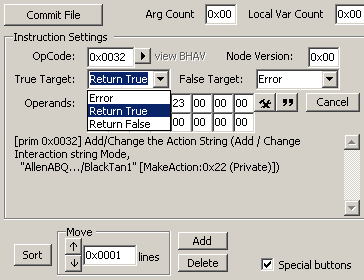
Notice the linking arrows on the right of instructions: now the rest of the BHAV is unlinked. Leave it as is: we may need the rest later.

If we want to add more skintones, we just need to repeat the steps before, re-link the instruction in that BHAV, and stop it again with a TRUE target when we need:


5. Linking submenu to main menuSelect BHAV: Interaction - Set Custom Skin - TEST.

Don't mind those mysterious "invalid BHAV" instructions; they're probably different in your SimPE, because they depend on how your SimPE is configured and stuff like that. Just focus on the last instruction (#6): that will directly call our friend the BHAV Sub - Melodie9 - Action String.
We need to add the other friend, the cloned one: Sub - AllenABQ - Action String.
To clone a BHAV instruction, with all its links and stuff, we have to use the special buttons: check the box next to the name, and 9 new buttons will appear:
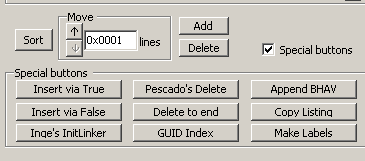
With instruction #6 selected, click on "Insert via True", and
voilą, a new #7 instruction, identical to #6.
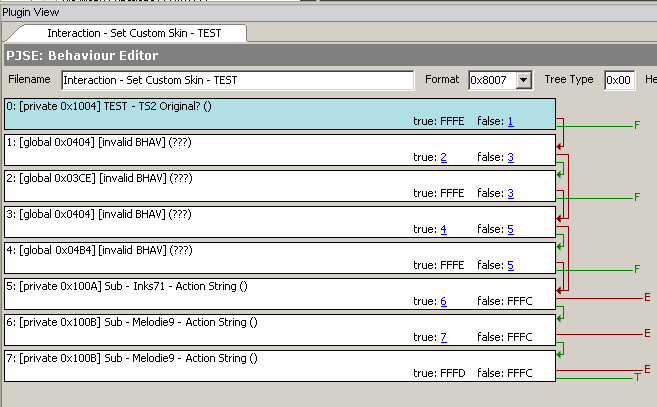
Select that #7 instruction and click on the arrow/triangle button between "OpCode" and "view BHAV".
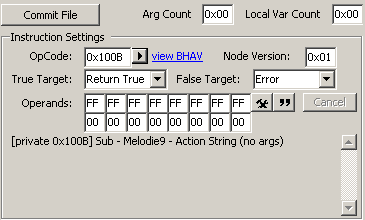
In this new Resource Chooser window, select "This Package" tab and Sub - AllenABQ - Action String and click Okay.
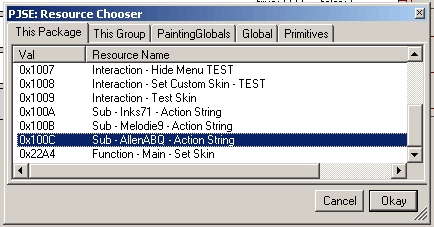
Done!

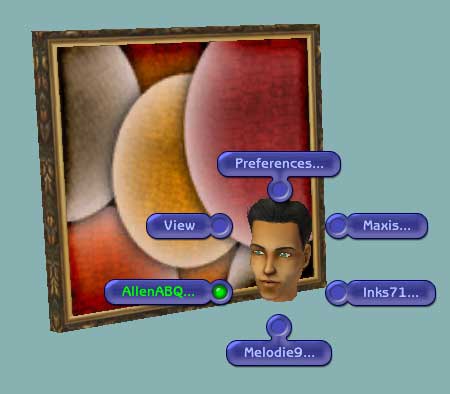
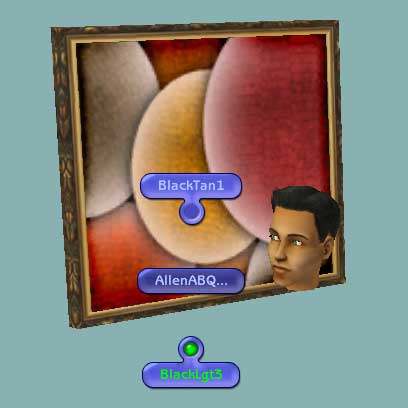
EDITED TO ADD: This is the result, in game, with the new AllenABQ menu and the two skintones: that cute dude will have soon a hairy chest!
EDIT 2: Attached a clone of CCSS, with a new GUID, cleaned up as a template.


